One minute your fan is humming away, keeping that muggy afternoon bearable. The next—dead silence. No click, no buzz, not even a flicker of power. What happened? Fans feel simple, but when they stop, that quiet seems to shout. More people rely on their fans year-round than you'd guess. In the United States alone, around 90% of homes use fans for cooling or air circulation. And every single year, thousands of those fans suddenly refuse to turn on. What causes them to just stop, and can you actually bring them back to life without calling in the pros or tossing them out?
What Makes Fans Quit: Common Causes and Surprising Culprits
If your fan gave up on you, it’s tempting to blame cheap manufacturing or a short life span. But the truth is, most fans fail for a handful of completely fixable reasons. Did you know most electric fans, when properly cared for, are expected to last up to ten years—sometimes even more? That’s not bad, considering how much punishment they endure: dust, variable voltage, banging into furniture, and the off-on-off cycles every season brings.
The top reasons fans suddenly stop working aren't always dramatic. Here are the big ones:
- Power supply issues: Bad plug connections, tripped circuit breakers, or a busted power cord are way more common than a burnt-out motor.
- Buildup of dust and debris: A dirty fan can overheat and short out, or dust can even jam blades and the motor housing.
- Worn-out switches: Toggle or rotary switches on fans take a beating and are a notorious failure point.
- Blown thermal fuse or capacitor: Many modern fans contain a tiny thermal fuse that will break the circuit if things get too hot, or a capacitor that helps the blades start spinning. If either is blown, the fan sits useless until replaced.
- Motor failure: Less common but yes, sometimes the motor itself is toast. Usually, there's a burning smell or obvious signs of trouble first.
You’ll notice a pattern here—nearly every issue is visible or accessible with basic tools, if you know where to look.
Quick Checks: Rapid Fire Troubleshooting Before You Disassemble
If your patience is frayed, take a breath. About one in three fans that "break" aren’t actually broken—they just need a nudge. Here’s a checklist anyone can start with, before grabbing a screwdriver.
- Check the wall outlet with another device. Plug in your phone charger or lamp. No power? The issue is likely not your fan.
- Inspect the plug and cord. Are there visible cuts, fraying, or burn marks?
- Look at the fan’s controls. Sometimes dust or a sticky liquid from last week's iced tea can gum up the works. Give the switch a gentle workout—it’s worth a minute.
- Test the power strip, if you use one. Many have surge protectors that silently trip out and need resetting.
- Look around the fan’s base and vents for signs of dust, pet fur, or even kids’ toys wedged into the grille.
Still nothing? Don’t give up. It’s time to get hands-on. A quick scan of repair forums shows over half of "dead" fans just need basic cleaning or rewiring at the connection points. Not exactly headline-worthy, but it’s great news if you’d rather not buy a replacement right now.

The Right Way to Take Apart Your Fan: Tools, Safety, and Step-by-Step
If you’ve made it this far, you’re probably ready to crack open the case. Good news—most desk, pedestal, and window fans are designed to be taken apart for cleaning and repairs. And unlike other small appliances, they rarely have sealed or riveted parts that need fancy tools. Here’s how a typical teardown works:
- Unplug the fan from the wall (sounds obvious, but you wouldn’t believe how many accidents happen this way!).
- Use a damp cloth to clean off outside dust. This makes opening it up easier and safer.
- Look for screws in the base or around the motor housing—usually four to six. Phillips (cross-head) screwdrivers cover 99% of jobs. Place screws in a cup or lid so nothing rolls away.
- Remove the front grille and blade. Some blades snap off with gentle wiggling, others have a tiny reverse-threaded nut holding them in place.
- Look for corroded wires, scorched spots, or blown fuses inside. If you spot a small glass or ceramic cylinder with burn marks, that's likely the thermal fuse and could be the cause.
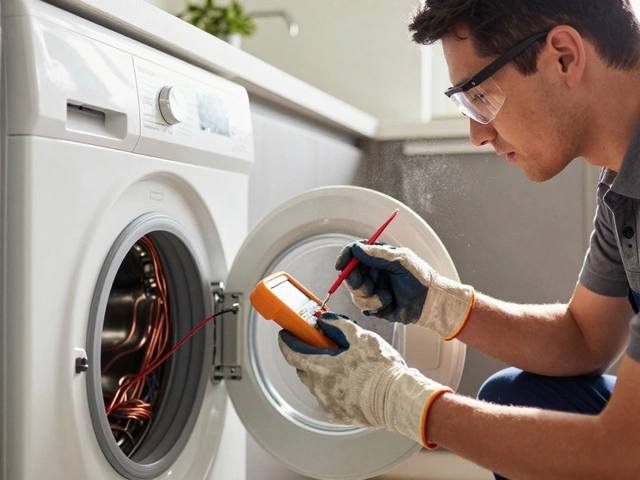
- Test the switch with a multimeter on "continuity." No beep or reading? A $2 switch could be the fix.
- Take a photo at each step—trust me, it makes reassembly a million times easier, especially after a coffee break.
Here’s a fun fact—according to a 2023 appliance survey, 75% of first-time fan-tinkerers fixed their unit without replacement parts, just a deep cleaning and reconnecting loose wires. The best part? No specialized skills required. If you’re comfortable changing a light bulb, you’re halfway there.
Replacing the Parts That Most Often Fail: Simple Repairs That Work
Once you’re inside, it’s amazing how many problems are as plain as day. Here’s where you put your handyman hat on and target the real trouble spots.
- Loose wires: You’d be surprised how many fans quit over a wire that vibrated loose. If you spot a wire hanging free, use pliers to bend the connector tight again, or replace if it’s melted or scorched.
- Switch or knob failure: Switches can be pried out or unscrewed, and most hardware stores stock generic replacements.
- Blown thermal fuse or capacitor: Look up your fan brand and "thermal fuse" or "capacitor" online. Most common spares cost under $8 and ship fast. There are YouTube guides for almost every model out there.
- Cracked blades or jammed rotor: Blades are usually replaceable. For jammed bearings, rubbing a few drops of sewing-machine oil onto the metal shaft can free up years of stuck dust.
Wondering if motor failure is the end of the line? Actually, not always. It’s rare, but if replacing capacitors and fuses brings no joy and the motor remains stubbornly inert, small appliance repair shops often have affordable rebuilt motors that cost far less than a new fan. One shop owner I met last year told me he keeps over 60 old fan motors on hand for swaps and quick fixes.
Take a look at how parts cost compare (price ranges from big-box stores, May 2025):
| Part | 2025 Cost (USD) |
|---|---|
| Thermal Fuse | $3 – $7 |
| Switch Assembly | $2 – $15 |
| Standard Capacitor | $4 – $12 |
| Replacement Blade | $7 – $25 |
| Motor Replacement | $19 – $45 |
Repairing your fix a fan project is usually cheap, fast, and doesn't take an engineering degree. Plus, you'll feel a weird sense of victory you just can’t buy. Aria always laughs at my look of triumph after I get a stubborn appliance spinning again.
Keeping Your Fan Alive: Cleaning, Storage, and Pro Tips You Wish You Knew Sooner
Here’s the kicker—not only is it easy to fix fans, you can stop most problems before they start. Want your fan to last longer than the average? It’s all in the maintenance.
- Clean your fan at least every three months if you use it daily—dust and hair inside the vent drastically shorten motor life!
- Never run your fan on an uneven surface—it’ll vibrate, loosening wires and prematurily wearing out parts.
- When putting away for winter, unplug, wipe down thoroughly, and cover with a cloth to keep out dust.
- If your room gets humid, try silica gel packs in the fan base while in storage. It helps block rust on bearings and switches.
- Oil metal shafts every year or so with a drop of non-detergent oil—no WD-40! Look for light machine oil meant for appliances.
Did you know? The #1 reason fans fail in college dorms is spilled drinks seeping into switches and motors. If your room is a beverage warzone, keep fans up on shelves or stands.
One last thing—a properly working fan can lower perceived room temperature by up to 4 degrees Fahrenheit. That saves you cash on AC bills when heatwaves roll in. There’s a real dollar value to a fan you can trust, and with a little DIY know-how, you won’t be sweating a sudden failure again anytime soon.