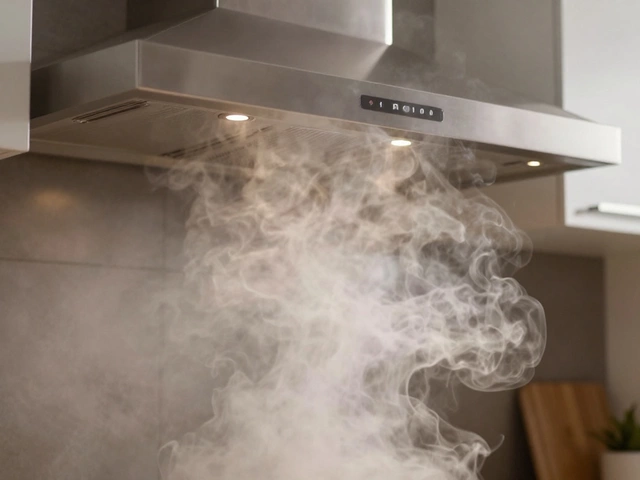
Imagine you’re right in the middle of cooking a sizzling pan of bacon, and suddenly your extractor fan just… gives up. The smells linger. The kitchen fogs up. You’re left facing a steamy mess. Extractor fans, those little workhorses in bathrooms and kitchens, rarely get attention until they quit. But what actually causes these useful gadgets to tap out? The answer isn’t as simple as a broken fuse. Sometimes it’s obvious—other times, it’s as subtle as dust buildup you can’t even see. Let’s rip off the cover, peek inside, and get our hands dirty finding out what really goes wrong with extractor fans.
Main Causes of Extractor Fan Failure
Most extractor fans give you warning signs before they stop for good. Maybe it’s a weird rattling noise, a lingering musty smell, or a weak breeze. Sometimes, though, they just shut off and leave you wondering what happened. The main causes usually fall into one of four categories: electrical faults, mechanical wear, blockages, and environmental effects. It’s amazing how a layer of dust, a burned-out motor, or a tripped circuit can bring a mighty extractor fan to its knees. Defective wiring or worn out switches are another silent killer. Moisture can corrode parts behind the cover, especially in bathrooms. Even a power surge from a lightning storm miles away can send that delicate motor to the scrapyard.
The most common villain: electrical failure. Faulty wiring, loose electrical connections, or a worn-out switch will cut the fan’s power. Sometimes the culprit hides inside the wall with a breaker that’s tripped—not always obvious if you’re not looking for it. When the fan tries to turn on with no juice, you get silence. But when it sputters or only runs for a few seconds, the problem often lies with the capacitor or windings inside the motor. Older fans suffer the most as wires and connections corrode over time. And don’t forget about fuse issues—a blown fuse in the fan’s main power feed will stop it cold.
Mechanical failures sneak up, too. The most hardworking part, the *motor*, takes a beating over the years. Dust, grease, and humidity wear down the bearings. Once friction sets in, the motor heats up, then dies. You can often tell when you hear a whining or grinding sound before the fan stops for good. Blade damage is also a sneaky problem—if the fan blades warp or crack, they might jam the whole motor assembly. If your fan screeches or vibrates more than usual, that’s a huge red flag.
Blockages are an underestimated enemy. In kitchens, extractor fans face a relentless battle against sticky cooking vapors, fat, dust, and spider webs. All this muck builds up on the blades, in the filter, or inside the duct. Eventually, it blocks airflow and stops the fan from spinning freely. If your fan seems to spin but barely moves air, this could be why. In bathrooms, lint, dust, and mold are the main offenders. It’s shocking how fast a vent gets stuffed up, especially if you have pets.
Environmental factors make a surprising impact. Humidity is the silent killer—especially in bathrooms where moisture hangs in the air. Metal parts rust or seize, especially if the fan isn’t designed to handle constant moisture. Temperature swings can cause plastic components to crack or warp, and even the sealant can break down. Cheap fans often don’t stand up to tough environments and fail after just a few years.
Diagnosing a Non-Working Extractor Fan
This is where things get a little detective-like. Before tearing down the ceiling or declaring the fan dead, it pays to do some quick checks. First, always look to the basics: Is the fan getting power? Did a breaker trip? Simple tests save lots of sweat. Grab a lamp or another small appliance and plug it into the same outlet (or circuit) your fan uses. If there’s no power, check the breaker box or fuse panel. About 45% of extractor fan issues turn out to be a simple power or switch problem—easy to fix if you catch them early.
If the fan has power but doesn’t move, give it a little nudge with a stick or pencil (after turning the power off for safety). If the blades spin freely, the motor might have failed. If they’re stiff or locked, debris or seized bearings are likely the problem. A burning or hot smell is often a clue that the motor’s overheated or fried. Listen for humming sounds, which mean the fan is trying to start but can’t get going—could be a capacitor gone bad.
Sometimes the fan works, but airflow is weak. Pop off the cover and check for dust, grease, and gunk. The difference after a good cleaning can be crazy—many people think the fan is dead when all it needs is a scrub. Shine a flashlight into the duct (if you can) and look for blockages. Flexible ducts can sag and pinch off airflow, so run your hand along the duct for soft spots or kinks. Some fans have a backdraft shutter that can get stuck or warped, blocking airflow entirely.
Check the control side, too. Faulty wall switches or timers (especially old mechanical ones) cause about 20% of mysterious failures, particularly in bathroom fans. Try the fan with a different switch, or bypass the switch entirely (if you know how and follow safety rules). For fans with humidity sensors or electronics, those sensors can quit or deliver false readings, so the fan won’t kick on when it should.
For models connected to a lighting circuit, check if the lights have flickered, dimmed, or failed—sometimes the issue is with the entire circuit, not just the fan. And of course, listen for any odd clicking, humming, or buzzing that points to electrical or mechanical stress inside the fan.

Easy Fixes You Can Try Yourself
You don’t need to be an electrician to handle a surprising number of extractor fan problems. If it’s a basic blockage or loose connection, you can usually fix it in minutes. Always start by shutting off the power—no shortcut there. Remove the fan’s cover and filters. If you spot dust, grease, or spider webs, wash these parts in warm soapy water. Even a quick vacuum around the motor can make a world of difference for airflow. Caked-on gunk absolutely kills efficiency. Your nose knows—if it stinks, it’s long overdue for a clean.
Connections sometimes slip out of their terminals, especially in fans that vibrate a lot. Check for any loose or burnt wires. If you’re handy with a screwdriver, tighten down the harnesses. Listen for the satisfying click as the connectors snap in. Swapping out a fried switch can be as easy as unscrewing the old one and slotting in a new one. Stick to products rated for bathroom or kitchen use—they resist moisture better and live longer.
If your fan rattles, it’s often because a screw is loose or a blade is bent. Gently bend blades back into shape, but don’t force them—they can snap. If the mounting plate or housing is vibrating, adding a rubber washer or gasket helps silence the noise.
Many extractor fans have filters made to trap grease or dust. Replacing or cleaning those filters every 3–6 months instantly boosts performance. If you share your home with smokers or pets (even the occasional fluffy guest), those filters clog even faster.
Got a humidity-sensing fan? Dust sticking to the sensor can mess up readings. Wipe the sensor gently with a cotton pad or small brush. If your fan’s electronic controls go haywire, unplug the unit, count to ten, and restart—just like rebooting a glitchy computer.
Extractor fan cleaning isn’t glamorous, but it’s quick and instantly rewarding. Fans that go years without cleaning burn out nearly twice as fast as those cleaned annually. Give yours some love and see (or smell) the difference.
- Unplug or shut off power to the fan at the breaker.
- Remove cover, filter, and visible dirt inside the housing.
- Vacuum or wash all parts and let dry completely before reassembly.
- Check for obvious blockages or damaged wires.
- Tighten connections and replace worn-out filters.
- Test with power back on and listen for rattles or hums.
When It’s Time for a Professional Repair
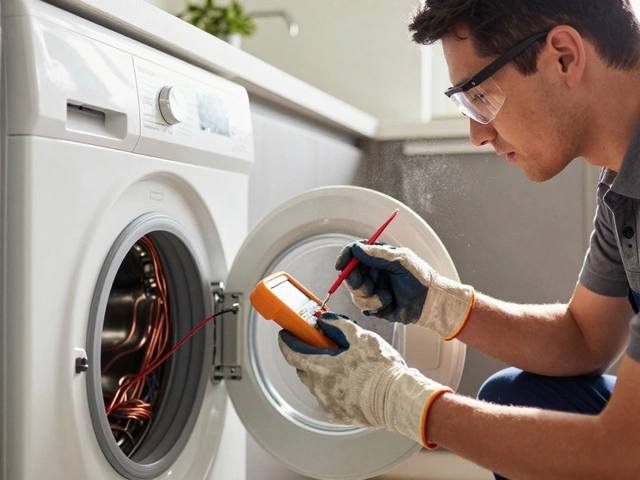
Sometimes, a faulty extractor fan just refuses to cooperate. Here’s where pros really earn their keep: when it’s a problem with the motor, circuit board, or buried wiring, it’s safer (and often cheaper) to call for help. Fan motors run at high speeds and sometimes get dangerously hot if they’re failing. If you spot melted plastic or burn marks, shut everything down and skip the DIY route.
Fans that are hardwired into weird places or stuck behind tiles need careful hands and tools. The same goes for fans mounted way up in the attic or above a shower. Touching the wrong wire or snapping a plastic housing can cause more harm than good. If your house is older and you see ancient, cracked insulation on the wiring, it’s time for a professional to handle it. Lead or asbestos ducts (still hiding in some 1970s homes!) are serious hazards and need special care.
Circuit boards—the brains behind fancy fans—can fail after a power surge or years of soakings from bathroom humidity. If your fan uses special timers, remote controls, or connects to your smart home gear, don’t gamble with a guess—it’s easy to turn a small issue expensive fast.
Here are clear signs to call in a pro:
- Fan is dead and there’s power at the socket or wires.
- You spot signs of burning or melting inside or around the fan.
- Fan won’t start even after a new switch or fuse.
- There’s buzzing, clicking, or sparking sounds.
- Wiring is crumbly, insulated with cloth, or looks suspiciously dated.
- You suspect major blockages deep in the ductwork (birds, nests, or collapsed ducting).
- The fan is built into a wall with no obvious access panel.
A specialist will have the right tools to safely test voltage and swap motors, circuit boards, or even entire duct runs. They might even recommend a better, energy-saving fan to replace old clunkers—modern extractor fans use up to 50% less power and run quieter, so you get a win-win.

How to Prevent Extractor Fan Failure
Extractor fans last longer if you keep them clean, dry, and unblocked—simple, right? A few habits go a long way. Set a reminder to deep clean the fan every season. Even running a vacuum nozzle over the cover and the first foot of ductwork clears out most dust. Empty or wash grease traps every month during heavy cooking seasons. If you spot rust, dab on a little mineral oil or install a rust-resistant cover.
If you’re remodeling or replacing a fan, pick a model that matches the room size and usage. An underpowered fan burns out faster than one designed for the space. Look for fans rated for humidity and easy filter swaps—bathroom models with sealed motors last about three years longer than bargain brands.
If your fan vents to an outside wall, check the outside grille a few times a year—it’s not unusual for birds to “help tidy up” by stuffing it with twigs. On blustery days, those grilles can blow shut or break, choking airflow.
Check out this quick table on fan life versus maintenance:
| Maintenance Level | Typical Fan Lifespan | Annual Breakdown Rate |
|---|---|---|
| Cleaned every 3–6 months | 10–15 years | 5% |
| Cleaned once a year | 7–10 years | 13% |
| Never cleaned | 3–5 years | 24% |
Modern extractor fans often come with energy-efficient motors, quiet operation, and easy-clean features—don’t be afraid to upgrade if you’re constantly fighting problems. Many new kitchen extractor fans use less than 20 watts of electricity, compared with 60–90 watts for older models, and come with built-in grease catchers. If you’re accident-prone or forget to clean, these are a lifesaver.
Also, keep tabs on circuit breakers and consider adding a surge protector (especially in lightning-prone areas) to shield electronic fan controls from sudden spikes. Swapping the switch for a humidity sensor can help ensure the fan only runs when needed, saving both wear and energy.
Finally, don’t ignore new noises, weak airflow, or bad smells. Fans rarely die without warning—catching problems early turns a crisis into a quick, easy fix. Take 10 minutes every few months to check your extractor fan and you’ll keep your home fresher, drier, and a whole lot less steamy. You’ll spend more time enjoying your kitchen and bathroom, and less time battling stubborn, lingering smells.