Exhaust fans play a crucial role in homes, helping to ventilate spaces such as bathrooms and kitchens by pulling out moisture, odors, and airborne particulates. When these hard-working devices falter or fail, it might seem daunting, but repairing them is often possible and may even be more economical than replacing.
Understanding the common issues exhaust fans face and how to address them not only saves your pocketbook but also contributes to household safety and efficiency. From recognizing strange noises to addressing reduced airflow, diving into the world of fan repair can be surprisingly manageable. Whether you're a DIY enthusiast or someone considering professional help, insights into the inner workings of these fans can be enlightening.
- Understanding Exhaust Fan Functionality
- Common Problems in Exhaust Fans
- Basic Troubleshooting Steps
- DIY Repair vs Professional Help
- Tools and Materials Needed
- Maintenance Tips for Longevity
Understanding Exhaust Fan Functionality
Homeowners might overlook the humble exhaust fan, yet it is an unsung hero diligently safeguarding air quality and preventing moisture-related damages. These fans, commonly installed in moisture-prone areas like bathrooms and kitchens, are designed to pull out humid, stale, or greasy air and replace it with fresh air. This constant replacement is critical in damp areas to curb the growth of mold and mildew, which thrive in humid environments. Understanding how these fans work begins with grasping the components and mechanics involved in their operation.
Typically, an exhaust fan consists of a motor, blades, housing, and a vent. The motor powers the blades, creating air movement through the vent. In more advanced systems, like those found in kitchens, exhaust hoods contain filters to trap grease and particulates. Air sucked in by the rotating blades is expelled outdoors through ducting, which should be adequately sealed and maintained to ensure efficiency. It's essential to match the fan's capacity, often measured in cubic feet per minute (CFM), to the room's size for optimal performance. Common calculations suggest a minimum of one CFM per square foot of room space.
The sophistication of exhaust fans ranges from simple wall-mounted systems to more complex attic or ducted setups. While wall fans remove air directly out of the building through a wall, ceiling or inline fans use ductwork. This ductwork channels airflow to a vent, often located at the roof or a side wall. A general rule lies in ensuring that duct runs are as short and straight as possible, minimizing bends that can hinder airflow. This awareness of the spatial and technical dynamics is crucial when diagnosing relative air movement issues, which can lead to subpar performance.
Modern exhaust fans also come equipped with additional functionality, including integrated lights, humidity sensors, and even heat lamps. Humidity sensors are particularly valuable, allowing fans to automatically activate when moisture levels exceed a set threshold. These advanced features not only improve convenience but can significantly impact energy usage, leading to cost savings. By understanding these elements, you are better equipped to evaluate which exhaust fan meets your needs, as well as identifying when elements of your fan might not be working effectively.
"Proper ventilation is essential for a healthy home, minimizing health risks from mold and indoor air pollution," states the EPA, highlighting the critical nature of these systems. When considering replacements or upgrades to exhaust fans, the Environmental Protection Agency recommends Energy Star-certified fans, which can be up to 70% more efficient than standard models.
A crucial aspect to ensuring these fans serve their purpose lies in regular maintenance and understanding potential obstacles. Clogged or dirty filters, overheated motors, and obstructions in ductwork can all impair a fan's functionality, emphasizing the need for routine checks. Cleaning, testing motor efficiency, and ensuring unobstructed airflow all form part of understanding and maintaining exhaust fan functionality. With careful attention and understanding, one can preserve the vital role these fans play in a home's ecosystem.
Common Problems in Exhaust Fans
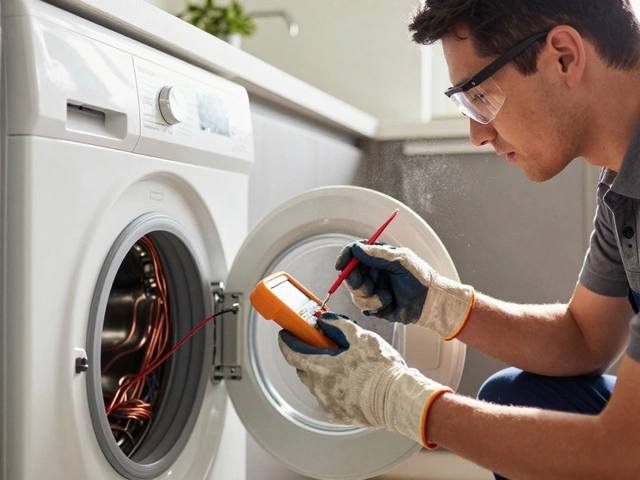
The humble exhaust fan, despite its seemingly simple function, can encounter a variety of issues that may perplex the average homeowner. Among the most prevalent problems is the fan simply refusing to turn on. This can often be traced back to issues with the power supply. Wiring could be compromised, connections might be loose, or the switch itself could be faulty. It's crucial to check for these possibilities before considering more complex solutions. Circuit testers and multimeters are useful tools for diagnosing electrical issues, particularly when tackling this non-starting problem.
Another frequent complaint among users is the fan's inability to effectively move air, resulting in lingering odors, steam, or smoke. This could stem from obstructions within the ductwork or a clogged fan filter. Over time, dust, grease, and other particles can accumulate, greatly reducing efficiency. Periodic cleaning of these components is essential to maintain optimal performance. A simple mix of soapy water and careful scrubbing can often work wonders. On certain occasions, a professional duct cleaning service might be warranted if the blockage is extensive and deep within the ventilation system.
Noisy operation is another notorious challenge. While some level of humming or whirring is expected, excessive noise can indicate worn bearings, imbalanced fan blades, or a motor that is struggling. To address this, one must first ensure the fan is securely mounted and that all screws are tightened. If the noise persists, removing the cover and gently checking for debris caught in the blades can be the next step. In cases where the motor appears to be the root of noise issues, lubrication or replacement might be necessary. According to home improvement expert Bob Vila, "Regular maintenance of moving parts can extend the life of your fan while minimizing disruptive noise."
Some fans can develop intermittent performance, working one moment and then coming to a sudden stop. This issue often points towards an overheating motor, usually caused by prolonged use, improper installation, or lack of lubrication. If the fan shuts off on its own, it might have a thermal cutoff switch as a safety feature against overheating. Ensuring the fan is appropriately rated for the space and usage is crucial; sometimes, the fan is simply being asked to do more than it's designed for. Investigating these areas can lead to a quick solution without necessitating a full replacement.
Basic Troubleshooting Steps
When your exhaust fan is not performing as it should, embarking on a troubleshooting journey can be both enlightening and practical. Begin with the basics: check that the unit is receiving power. More often than not, the simplest issues can stem from tripped circuit breakers or blown fuses. Access your home's electrical panel and identify if the corresponding switch is in the 'off' position. If you're unsure of what to look for, a simple flip back to the 'on' might just do the trick. Should this fix the problem, then rejoice in the simplicity of your solution!
Next, you'll want to verify that the fan's ability to spin is not hindered by dust or debris accumulation. This is a common culprit, especially in older units or those in environments with higher airborne particulates. Carefully remove the fan cover – often a simple snap or screw design – and visually inspect the blades and motor housing. Not only does this ensure the functionality of your repair extractor, but it also helps in maintaining air quality within your home. Employ a soft-bristle brush or vacuum with a nozzle attachment, taking care not to apply excessive force. Cleaning out the gunk can do wonders for a sluggish fan.
"A regularly cleaned exhaust fan enhances your home’s ventilation efficiency and extends the lifespan of the appliance," quotes a seasoned expert in home appliances, underscoring the significance of routine maintenance.
An often-overlooked aspect is the ductwork connected to the fan unit. Blockages in these conduits significantly impair ventilation performance. Navigate the pathway of the ductwork leading outside; often, a quick assessment reveals nests or outdoor debris, particularly in vent openings. Addressing these blockages not only revives a struggling fan but also prevents potential fire hazards. Sometimes, a simple flashlight can provide all the visibility needed to identify and rectify these obstructions.
Listen to the Sounds
Noisy operations often point toward hardware out of balance or deteriorating bearings. Listeners will notice a pattern to sound changes, and it's important to pay attention to these audial cues. Before jumping to conclusions, check screw tightness on mounting brackets or housing, as vibrations might amplify even the slightest budge. Regular grinding or rattling might indicate a need to lubricate parts, emphasizing once again the importance of a well-maintained system. Utilize manufacturer-recommended lubricants sparingly, avoiding over-application which can attract dust.
Lastly, an overlooked yet essential step is consulting the fan's manual. It's a treasure trove of model-specific insights and troubleshooting tips. For digital-savvy homeowners, many manufacturers offer downloadable PDFs on their official websites, expanding accessibility without the need to rummage through cluttered paperwork.

DIY Repair vs Professional Help
Embarking on the journey of fixing an exhaust fan can initially seem overwhelming, particularly if you're unfamiliar with basic electrical work or mechanical components. However, for many common fan problems, going the DIY route is entirely feasible and often rewarding. The primary advantage of handling repairs yourself is the cost-saving aspect, as professional fees can add up quickly. Typical issues like a noisy fan, a slow or stuck blade, or even minor electrical glitches can often be fixed with basic tools found in most households.
The internet offers a plethora of resources such as video tutorials, step-by-step blog guides, and community forums where experienced DIYers share their knowledge. This empowers even the most novice of repair people to tackle a repair extractor task with confidence. Yet, there's a compelling counter-argument to consider engaging a skilled technician. Professionals bring a wealth of experience and can efficiently diagnose complex issues that might be time-consuming for a layperson to figure out, saving you from potential safety hazards.
For more intricate problems, like motor issues or electrical faults beyond a simple wire reattachment, professional services could be a more prudent choice. According to a survey by IBISWorld, professionals typically resolve fan issues within an hour, reinforcing their advantage in terms of speed and efficiency compared to the average DIY attempt. Moreover, certified repairs often come with warranties, providing peace of mind that DIY may not offer.
"Choosing between DIY repairs and professional help often hinges on the complexity of the issue and one's comfort level with tools," remarks John Harrington, a renowned home repair expert.
If you decide to go the DIY route, start by assembling the essential tools: a screwdriver, pliers, multimeter, and possibly a lubricant for squeaky components. Check the manual of your fan model for specific troubleshooting insights. For safety, always ensure that the fan is disconnected from all power sources before you begin any work. If a DIY repair doesn't resolve the problem, or you encounter an unexpected complication, don't hesitate to contact a professional. In some cases, your decision might depend not just on the repair scope but on available time and confidence with mechanical projects.
Tools and Materials Needed
Diving into the nitty-gritty of repairing your exhaust fan, it’s crucial to be prepared with the appropriate tools and materials. Armed with the right toolkit, even the seemingly complex task of repairing an extractor fan becomes remarkably manageable. This preparation not only saves time but ensures safety and precision. First on the list is a multi-bit screwdriver set, as you'll often find several types of screws holding the exhaust fan parts together. A pair of pliers, both needle-nose and flat-head, will serve you well when handling wiring or loosening small nuts and bolts. Along with these basic tools, a flashlight or headlamp is vital for inspecting the often dimly lit areas where these fans are installed.
Additionally, a multimeter is an essential tool for testing electrical connections and ensuring that your circuits are functioning correctly. Working with electricity requires extra caution, which is why having a reliable voltmeter is indispensable. It helps ensure you won't unintentionally expose yourself or others to electric hazards. Using a ladder that's sturdy and reliable is important as well—many fans are mounted above eye level, often in ceilings. Therefore, accessing them safely is a concern that should not be taken lightly. Safety glasses and gloves are recommended to protect yourself from dust or accidental cuts while handling fan components.
Equally crucial are the materials you might need to make repairs. Electrical tape is necessary for securing wire connections after testing them, and depending on what the issue might be, replacement screws and wall anchors could be required. For noise issues, such as a rattling fan, rubber washers might serve to dampen vibrations and improve the fan’s function. Have some spare wires handy too, as short circuits or damaged wires can sometimes be the root cause of an extractor fan's malfunction. Lubricants may also improve performance, used judiciously on moving parts to reduce friction and wear.
For those less familiar with repair tasks, a practical guide or manual specific to your fan model can provide detailed diagrams and repair insights, serving as a valuable reference. To quote a notable home repair expert,
"Having a clear plan and the right tools is half the battle won when embarking on any repair job at home." - Bob Vila.This advice resonates with anyone who has experienced the difference between tackling a repair blindly versus doing so with a structured approach and the necessary equipment. For those looking to monitor their fan's performance post-repair, a fan speed controller may also be useful, assisting in optimizing the fan's operational efficiency.
Maintenance Tips for Longevity
Keeping your exhaust fan in top shape ensures that it functions efficiently and has an extended lifespan. Regular maintenance is key. Start by ensuring that the fan is always clean. Over time, dust and grease can accumulate, especially in kitchen exhaust fans, which can lead to reduced efficiency and even more severe problems like overheating. Cleaning these fans should be done at least twice a year using a damp cloth and mild detergent, being cautious with the electrical components.
Another crucial aspect is inspecting the fan for any signs of wear and tear. Check for loose or vibrating components, as these could indicate a failing motor or fan blade imbalance. Correcting these issues early can prevent more significant problems in the future. Schedule a time every few months to examine the venting and ductwork connected to the fan to ensure there are no blockages or leaks that could compromise performance. Sealing any gaps with appropriate duct tape or sealant can also greatly improve efficiency.
It is essential to remember the importance of lubrication. The fan motor's bearings require occasional lubrication to operate smoothly without producing noise. Consult the manufacturer’s manual for guidance on the type of lubricant to use and the intervals at which it should be applied. This simple step can significantly extend the lifespan of your fan and reduce noise levels.
Fan troubleshooting includes not overloading the system. Avoid altering the fan to increase its speed, as this can cause unnecessary strain on the motor. Instead, adjust your usage patterns. For example, after a shower or cooking session, allow the fan to run for an extended period to completely clear out lingering moisture and odors. This practice not only improves air quality but also ensures the system is not working harder than necessary.
If you take care of things, they last. Regular exhaust fan maintenance is no different, and the Investment in vigilance pays off in reliability," advises Walter Linden, a respected HVAC specialist.
Consider implementing an annual professional inspection. While DIY maintenance goes a long way, a trained technician can identify problems that may go unnoticed by a layperson. Their expertise in fan troubleshooting means they can suggest the best solutions or improvements, including whether it’s time for a fan replacement, before small issues become costly repairs.
To ensure your exhaust fan effectively removes pollutants, proper ventilation size is non-negotiable. Make sure that fans in high-moisture areas, such as bathrooms, are the adequate size to completely vent the space. A properly sized fan paired with routine maintenance work collaboratively to ensure longevity. By following these strategies, your exhaust fan will operate flawlessly, ensuring that you won't have to worry about unwelcome scents or moisture buildup invading your home.