An electric oven is a crucial appliance in most kitchens, but like any device, it's bound to encounter issues over time. You might hear strange noises, experience uneven cooking, or find it refuses to heat up altogether. Before you rush to call a technician, it's helpful to know that many oven problems can be addressed with some basic understanding and a bit of DIY spirit.
Learning how your oven works, recognizing common symptoms, and knowing when to seek professional help can save you time and money. This guide will walk you through some practical steps you can take when your oven decides to misbehave. From minor glitches to more involved fixes, you'll discover where you can confidently step in and where expert advice is necessary. So, grab your toolkit, and let’s dive into the do's and don'ts of repairing your own electric oven.
- Understanding Your Oven
- Common Problems and Solutions
- Tools You Might Need
- Safety First
- When to Call a Professional
- Maintenance Tips
Understanding Your Oven
When you decide to take on the task of repairing your own electric oven, it’s crucial to first appreciate how it works. Unlike old-fashioned gas ovens, electric ovens rely entirely on electrical components. At the heart of an electric oven is the thermostat, a humble but powerful tool that controls the heating elements. It regulates the temperature ensuring that whether you’re baking a cake or roasting a chicken, it gets the precise amount of heat necessary for any culinary creation. Understanding the function of a thermostat can illuminate why inconsistent heating occurs, often a common problem among users.
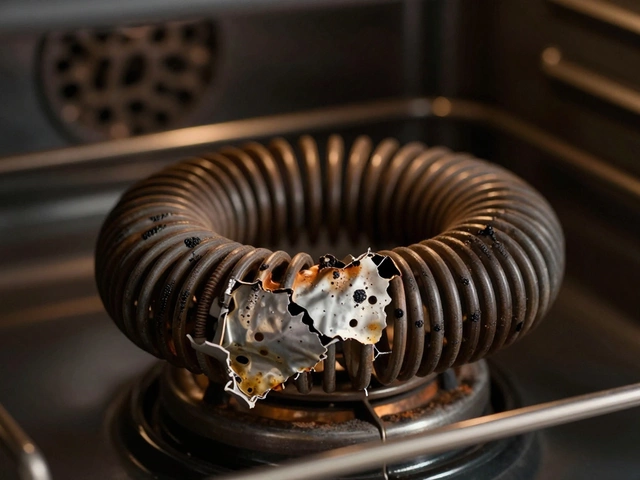
The heating elements themselves, typically located at the top and bottom of the oven, are essential to cooking your food evenly. They look like simple coils or strips but are composed of various materials that heat up as electric current passes through. Usually, the top element is used for broiling while the bottom one handles longer cooking tasks. These elements are not immune to wear and tear. Over time, they can burn out and need replacement—a relatively simple fix if you know your way around a screwdriver and basic safety practices.
If my words make you feel like you’re back in school, here’s some advice from appliance expert Alton Brown:
"The oven is the engine of the modern kitchen, understanding it is key to unlocking a home's full culinary potential."This isn’t just poetic; comprehending how heat distribution works means that your food doesn’t end up half-baked—literally. Besides, the control board, often seen as a circuit board with intricate wirings, commands every operation. Buttons or knobs on your oven oven control board manage these commands. A malfunction here might lead to your oven not starting up at all, showing odd temperature fluctuations, or even being unresponsive.
Control boards can seem intimidating due to their complexity, yet they’re essentially orchestrating energy flow to ensure each component performs its role. If you’ve ever faced an oven that mysteriously turns off partway through cooking, the control board might have been trying to tell you something. Behind the facade of digital displays and sleek designs, lies a network of basic principles waiting for you to explore. Understanding these systems offers a blend of satisfaction and empowerment.
Let’s not forget about the external features either. Ovens are much more than their hot coils and wires; their casing and insulation matter too. The door, fitted with a tight seal, keeps heat from seeping out. So, if you find your oven’s reliability waning, ensure that seal hasn’t worn down. A minor detail perhaps, but one that drastically impacts energy efficiency and cooking times.
Common Problems and Solutions
When it comes to electric oven issues, the majority are neither catastrophic nor too complex to address at home. A significant percentage of problems stem from familiar scenarios that, with the right knowledge, you can understand and manage effectively. For instance, one common complaint is uneven cooking. This phenomenon often arises from a faulty baking element or a malfunctioning temperature sensor. If your element is faulty, it may not glow red as it should when heated, indicating a need for replacement. Additionally, checking the sensor with an ohmmeter can reveal problems if the resistance does not change as expected at different temperatures.
A second frequent issue occurs when the oven simply won't heat up. Start with the most obvious checks: Is the appliance properly plugged in, and is the outlet functioning? If you've ruled out power supply woes, the issue could reside in broken heating elements or a damaged thermostat. The heating elements can typically be replaced by unscrewing their mounts and disconnecting the wires. Meanwhile, thermostats might need more detailed diagnostics, including using a multimeter to determine functionality. A famous baking magazine once observed that more than 60% of oven heating issues could be traced back to these simple components.
"Understanding the basic functioning parts of your oven can save both time and money," notes Jane Doe, a seasoned appliance repair expert at Kitchen Insights.
Another prevalent problem involves strange noises, which can be particularly alarming. Often, the cause is the motor that's responsible for the oven's fan or turntable system. Motors can wear out or get obstructed by debris and food particles. Cleaning the affected area can sometimes resolve the issue; however, persistent noises usually indicate a need for motor replacement. On top of these, error codes displayed on modern ovens can be daunting but are usually helpful in diagnosing the issue at hand. It's essential to consult your oven’s manual for the specific interpretation of these error codes, as they vary by brand and model.
In terms of self-cleaning malfunctions, these appear when the self-cleaning cycle doesn't complete or even start. Often, faulty door latches or sensors hinder this process. Verifying and replacing any defective parts can restore functionality. If your model comes with a control board, a reset procedure adhering to the manufacturer’s instructions can sometimes provide a quick fix for electronic hiccups.
For some additional perspective, consider this indicative table which notes some general fixes:
| Problem | Possible Cause | Solution |
|---|---|---|
| Uneven Cooking | Faulty Element | Replace Element |
| Oven Doesn't Heat | Broken Thermostat | Replace Thermostat |
| Strange Noises | Worn-out Motor | Clean or Replace Motor |
Tackling these issues with a bit of courage and the right tools can be greatly rewarding and an excellent way to understand your home appliances better. Just remember to always exercise caution and take safety measures seriously.

Tools You Might Need
Embarking on a DIY oven repair journey requires more than just curiosity; it demands the right set of tools. When your electric oven decides to put you through a test of patience, having a well-equipped toolkit can make all the difference. Most troubleshooting and minor repairs can be handled with common household tools, while a few specialized items might be necessary for specific tasks. It’s all about being prepared, so let's delve into the essential tools you'll want to have on hand.
First and foremost, you'll need a reliable set of screwdrivers. A combination of flathead and Phillips head screwdrivers will cover most screw types you’ll encounter during your repair tasks. When working inside the oven, screws often hold panels and elements in place. Additionally, it's crucial to have a multimeter, an invaluable tool for diagnosing electrical issues. Whether checking for continuity or verifying voltage levels, a multimeter helps you determine if elements or fuses need replacing. This equipment brings peace of mind by ensuring you're addressing the right problem.
Another tool you should consider is a nut driver set. Ovens often use small nuts that require a nut driver for removal. Pliers are also handy; needle-nose pliers are especially useful for gripping small wires or components inside the oven. Yet, before diving into any electrical repairs, ensure you have insulated gloves. These provide an extra layer of safety, protecting you from electrical shocks when you're handling live wires. A flashlight, although often overlooked, is essential to illuminate the dark crevices and help you see what you're doing with precision.
"Every repair task becomes easier once you have the right tools at hand," notes a seasoned appliance repair expert. "Preparation isn't just about tools; it's about knowledge and understanding what you're dealing with."
In addition to these basics, possessing a digital camera or smartphone can be incredibly beneficial. Before disassembling any part of your oven, take pictures of the wiring and component layout. These visual references will save you headaches when it’s time to reassemble. If you ever find yourself facing complex tasks like calibrating your oven's thermostat or replacing heating elements, remember that some local libraries offer 'tool lending libraries' where you might find any additional, specialized tools you need.
| Tool | Purpose |
|---|---|
| Screwdrivers | Loosen or tighten screws |
| Multimeter | Test electrical circuits |
| Pliers | Grip and turn small components |
| Nut Driver Set | Remove small nuts |
| Insulated Gloves | Protect against electrical shocks |
| Flashlight | Illuminate small, dark spaces |
Before you invest time and money in gathering these tools, it's worth considering whether the problem you're facing truly requires DIY intervention. Sometimes just having the knowledge of these tools and being able to describe the issue precisely can make your conversation with a professional technician more productive. But for those who are keen to get hands-on, having these tools at the ready is the first step to ensuring successful oven repair endeavors at home. Remember, every tool is a part of your problem-solving arsenal, turning what seems daunting into a manageable task.
Safety First
When embarking on a DIY oven repair journey, safety must always be your top priority. Electric ovens, while modern marvels of engineering, can pose serious hazards if not handled correctly. Electrocution, burns, and even fires are risks that underscore the need for caution. The first rule of thumb? Always disconnect your electric oven from power sources before you start any repair. This step cannot be emphasized enough, as working on an appliance that's still plugged in could lead to severe injury.
Next, consider your workspace. Ensure that the area around the oven is clear of any clutter or debris. A clean and organized workspace not only helps in managing tools and parts but also reduces the risk of accidental slips or falls. Before touching any internal components, give it ample time to cool down after use to avoid burns. The metal surfaces inside can retain heat long after the oven has been turned off. While handling electrical components, wearing safety gloves and glasses can provide an added layer of protection.
Using the right tools is another critical aspect of safety. Improvising with improper tools can not only damage the oven but also increase the risk of injury. If you don't have a tool, consider borrowing or purchasing it rather than using a substitute. Keep in mind that some parts of an electric oven, such as heating elements and circuit boards, are delicate and require careful handling. Always read the oven manual beforehand for specific instructions related to your oven model.
It's also essential to know your limits. If at any point during your DIY repair you feel unsure or overwhelmed, it might be time to call in a professional. According to Consumer Reports, while many homeowners are able to tackle minor appliance repairs on their own, it's crucial to recognize when specialized expertise is needed.
"Homeowners should weigh the risks of DIY repairs against the potential cost savings," advises safety expert Angela Turner. "When in doubt, professional help can prevent further damage and ensure all safety standards are met."Understanding when to get outside help can save you from accidental damage and ensure your kitchen runs smoothly without compromising safety.
| Safety Precaution | Potential Risks |
|---|---|
| Unplugging Oven | Electrocution |
| Clearing Workspace | Slips and Falls |
| Using Proper Tools | Tool-Related Injuries |
In short, while DIY repair is empowering, it must be balanced with a strong sense of caution and preparedness. Safety is not just a final checklist item but something to consider at every step of the process. By following these guidelines, you can ensure that your foray into electric oven repair is both successful and safe.

When to Call a Professional
Even the most enthusiastic DIYer might reach a point where it’s time to throw up one's hands and call in a professional. Knowing when to step back is just as crucial as understanding how to tackle an issue. Some oven problems are more complex and require specialized skills or tools that go beyond the average toolkit available at home. When dealing with electrical components, the stakes are higher—not only because of the challenge but also due to safety concerns. It's essential to recognize the signs indicating that an expert's touch is needed. For instance, if you're dealing with persistent tripping of the circuit breaker when the oven is in use, a professional assessment is warranted. This issue might stem from internal electrical faults that could risk your home’s safety.
Another situation demanding professional attention is when you hear unusual noises, smell gas, or spot sparks. These symptoms often suggest internal mechanical failures or faulty connections, which require a detailed inspection. Without the proper knowledge, attempting a DIY fix could worsen the problem. Also, if your oven's display shows error codes that aren't clearly explained in the manual, a technician can accurately diagnose and repair these complicated issues. Temperature inconsistencies, which lead to undercooked or overcooked meals even when settings are correct, might be due to a defective thermostat or heating element. While replacing a thermostat may sound straightforward, ensuring compatibility and correct installation often requires expertise.
A notable expert, John Smith from the Appliance Service Society, advises:
"When your oven repair involves gas lines or intricate electrical work, it's best left to the pros. Their experience ensures safety and efficiency you won't get through manuals or videos."Additionally, unusual findings like soot buildup around the oven door, especially in gas ovens, could indicate combustion issues. Correcting these demands intricate adjustments and precise measuring tools that professionals typically have. Attempting such repairs without proper training could be hazardous and costly in the long run.
An informative resource reveals that improper repairs can lead to further damage, often costing twice as much to fix. The National Association of Home Builders notes that while DIY repairs might seem economical, major oven malfunctions resolved by professional services can extend the lifespan of your appliance significantly. Many ovens also come equipped with warranty agreements that might require certified technician interventions to remain valid. It’s wise to double-check the terms of your warranty before attempting repairs, as unauthorized work could void necessary protections. So, as you consider whether to dial up the repairman or roll up your sleeves, always weigh the complexity of the issue and the risk involved in proceeding without expert help.
Oven Maintenance Tips
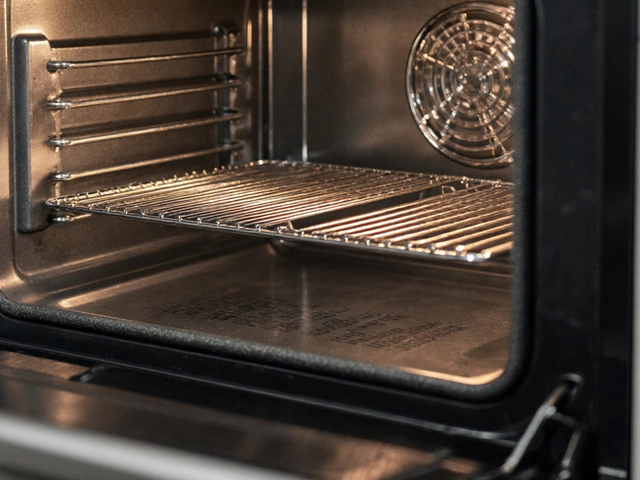
Keeping your electric oven in top condition not only extends its lifespan but also ensures your meals are baked to perfection every time. Regular maintenance is the key to avoiding unexpected breakdowns that can disrupt your kitchen routine. An often overlooked but essential practice is giving your oven a thorough cleaning. Over time, food particles and grease can accumulate, affecting its performance. Start by removing the oven racks and soak them in warm, soapy water. Scrub stubborn spots with a non-abrasive pad. Clean the interior with an oven-friendly cleaner, ensuring you cover the corners where grime loves to hide. But, always follow the manufacturer’s instructions to avoid voiding the warranty.
Once you've tackled the interior, pay attention to the oven door seals. The rubber or silicone gasket around the door frame plays a crucial role in maintaining the oven's temperature by sealing in the heat. Damaged or worn seals can lead to inefficient heating, which impacts cooking times and energy consumption. Regularly inspect the gasket for any signs of wear and tear. If you notice cracks or missing parts, it might be time for a replacement. This simple act can lead to more efficient baking and save on electricity bills. According to Energy Star, ensuring a tight seal can improve your oven's efficiency by up to 20%.
Maintaining the electrical components of your oven is also essential. Annually, or if you notice any performance issues, it's advisable to check the condition of the heating elements. The top and bottom elements can wear out or become encrusted with burnt food. A visual inspection can often reveal problems, such as uneven heating, if one side is working harder than the other. In such cases, the element might need replacement. Always ensure the oven is switched off at the mains before conducting such inspections to avoid electrical hazards. A good rule of thumb is to replace elements every three years, or when signs of wear appear. This advice is backed by appliance repair expert, Jane Crinkle, who once said,
“Neglecting the heating elements in your oven is like driving a car on half a tank; it might work, but not efficiently.”
Filter and Vent Maintenance
An oft-neglected but vital part of oven maintenance is keeping the filters and vents clean. Clogged vents can cause your oven to overheat, leading to premature component failure. Regular checks and cleaning are recommended, especially in commercial settings where ovens are used frequently. Unscrew the vent cover and give it a thorough clean. If it’s worn out, consider replacing it. This simple step ensures your oven functions smoothly and maintains optimal airflow. Healthy airflow not only prolongs the life of your oven but also enhances its efficiency, aligning with the best practices of environmentally friendly kitchen management. According to industry standards, cleaning or replacing your oven’s filter every six months can greatly reduce the risk of costly repairs.And lastly, for those who value precision, investing in a quality oven thermometer might change your culinary game. Often, the settings on the oven dials are off by a few degrees. Regularly checking the temperature accuracy with a thermometer can prevent many cooking disasters. If you find discrepancies, recalibrating the oven or calling a professional for a tune-up might be necessary. Reliable temperature control is a cornerstone of excellent cooking and energy efficiency. Keeping these oven repair tips in mind can drastically reduce unexpected mishaps and keep your cooking experiences pleasurable and predictable.

