Your oven isn't getting hot enough to bake a cake, or maybe it’s burning food on the bottom while leaving the top raw. You open the door, stare at that coiled metal strip, and wonder: is this thing dead? If so, is it actually worth fixing, or should you just bite the bullet and buy a new oven? It’s one of those moments where you stand in your kitchen holding a multimeter (or hoping you have one) trying to decide between spending an afternoon under the stove or writing a check for a brand-new appliance.
The short answer is yes, replacing a heating element is almost always worth it. These parts are relatively cheap, usually costing between $20 and $60 depending on your oven model. Even if you hire a professional technician, the total labor and parts bill rarely exceeds $200 to $300. Compare that to the price of a new electric range, which starts around $800 and quickly climbs to $2,000 or more for smart features and stainless steel finishes, and the math gets pretty obvious. But before you order a part, you need to make sure the element is actually the problem. Sometimes the issue is hidden behind the control board or a faulty thermostat, and swapping out the element won’t fix anything. Let's walk through how to diagnose the issue, calculate the real cost, and decide if you’re better off DIYing it or calling a pro.
How to Tell If Your Heating Element Is Dead
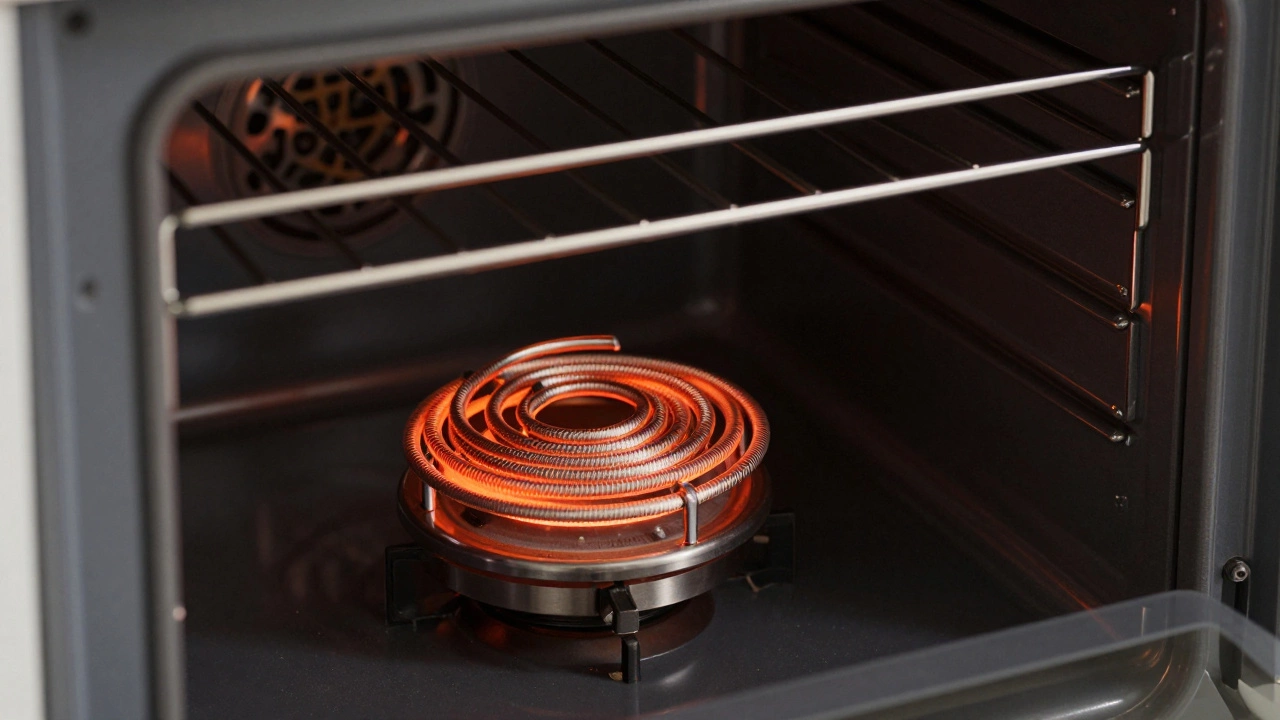
Before you spend any money, you need to confirm the culprit. An oven has two main heating elements: the bake element on the floor of the oven and the broil element near the top. They look similar but serve different purposes. The bake element glows red when you set the oven to bake, providing steady heat from below. The broil element only activates during broiling, blasting intense heat from above. If your oven doesn’t heat up at all, the bake element is likely the suspect. If it heats but won’t broil, check the top element.
Start with the visual inspection. Pull the racks out and look closely at the coils. Are there visible breaks, holes, or blisters in the metal? Sometimes you can see a gap where the wire has snapped. Look for scorch marks or melted spots that suggest a short circuit. However, don’t rely solely on sight. Elements can fail internally without showing external damage. A coil might look perfectly fine but still be open-circuited, meaning electricity can’t flow through it to generate heat.
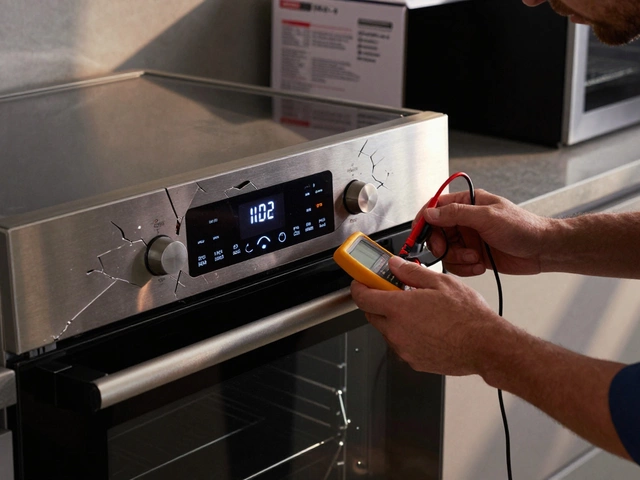
To be sure, you need a multimeter. Set it to measure resistance (ohms). Touch the probes to the terminals of the element. A working element typically reads between 10 and 30 ohms. If you get an infinite reading (often displayed as 'OL' or '1'), the element is broken and needs replacement. If the reading is zero, you have a short, which is also bad news. This simple test takes five minutes and saves you from buying unnecessary parts. Keep in mind that you must disconnect power to the oven before touching any components inside. Unplug the unit or turn off the breaker at your main panel. Safety first, always.
If you aren't comfortable using electrical tools, there is a helpful resource available online for various local services and directories, such as kizdar net, though for home repairs, sticking to certified appliance technicians is safer. For now, let's focus on the oven itself. If your multimeter shows a valid resistance but the oven still won't heat, the problem might lie elsewhere. Check the thermal fuse, the temperature sensor, or the control board. These components regulate power to the element. If they fail, the element never receives the signal to turn on. Diagnosing these requires more advanced knowledge, often pushing the decision toward hiring a professional.
The Cost Breakdown: Parts vs. Labor
Let’s talk numbers. The price of a replacement heating element varies by brand and model. Generic universal elements are cheaper but might not fit perfectly. OEM (Original Equipment Manufacturer) parts are pricier but guaranteed to match your oven’s specifications. For most standard brands like Whirlpool, GE, Samsung, or LG, you can find elements online for $25 to $50. High-end brands like Wolf or Sub-Zero can charge $100 or more for a single element.
If you do the repair yourself, your only cost is the part and maybe a pair of needle-nose pliers if you don’t already own them. Total expense: under $60. If you hire a technician, you’ll pay for their time. Service calls usually include a diagnostic fee, ranging from $75 to $150. If they find the issue and fix it on the spot, that fee often applies toward the total repair cost. Labor rates vary by region, but expect to pay another $100 to $200 for the actual replacement work. So, a professional job totals roughly $175 to $350.
| Expense Item | DIY Repair | Professional Repair |
|---|---|---|
| Heating Element Part | $20 - $60 | $20 - $60 (charged to you) |
| Diagnostic Fee | $0 | $75 - $150 |
| Labor | $0 (your time) | $100 - $200 |
| Total Estimated Cost | $20 - $60 | $195 - $410 |
Compare this to buying a new oven. Entry-level models start at $800, but installation costs add another $100 to $300 if you need new wiring or gas lines. Mid-range ovens sit around $1,200 to $1,800. Unless your oven is falling apart in other ways-broken door seal, rusted interior, malfunctioning controls-replacing just the element is a fraction of the cost. Even if you pay a pro, you’re saving hundreds, if not thousands, of dollars.

When Is It NOT Worth Fixing?
There are scenarios where replacing the element is a waste of money. First, consider the age of your oven. If it’s older than 10 to 15 years, other components are likely wearing out soon. The door gasket might leak heat, the fans could be noisy, or the electronic controls might glitch. Throwing good money into a dying appliance isn’t smart. In this case, budget for a new oven instead.
Second, check for multiple failures. If the element failed because of a surge caused by a bad control board, replacing the element alone won’t solve the problem. The new element will burn out quickly too. Technicians can spot these cascading failures during diagnostics. If they tell you that both the element and the control board need replacing, the repair cost jumps significantly. At that point, the value proposition shifts. You might be paying $400 to $600 for repairs, which is getting closer to the cost of a decent new oven.
Third, think about efficiency. Older ovens use more energy. Modern convection ovens heat faster and more evenly, saving you money on electricity over time. If your current oven takes 30 minutes to preheat and burns the edges of your pizza, upgrading improves your cooking experience beyond just fixing a breakage. Calculate your annual energy usage. If you cook daily, a new efficient oven pays for itself in lower utility bills within a few years.
Step-by-Step: How to Replace the Element Yourself
If you’ve decided to DIY, here’s how to do it safely. Most oven elements are held in place by two screws at the back of the oven cavity. Some models have brackets that slide forward. Always start by turning off the power at the circuit breaker. Don’t just unplug it if it’s hardwired; verify there’s no voltage with your multimeter.
- Remove the old element: Open the oven door. Locate the screws holding the element to the back wall. Unscrew them carefully. If the element is mounted on brackets, pull the front of the element outward to release the tabs, then slide it out from the back. Disconnect the wires from the terminals. Take a photo with your phone before disconnecting so you remember which wire goes where.
- Prepare the new element: Compare the new part with the old one. Ensure the shape, size, and terminal placement match exactly. If it looks different, stop and double-check the model number. Forcing a mismatched part can cause safety hazards.
- Install the new element: Connect the wires to the terminals. Tighten the screws securely but don’t overtighten, as this can strip the threads. Slide the element back into position or reattach the mounting screws. Make sure the element sits flat against the oven floor and doesn’t touch the sides or the racks.
- Test the oven: Turn the power back on. Set the oven to bake at 350°F. Watch the element. It should glow red within a few minutes. If it doesn’t, double-check your connections. If it does, let the oven run for 10 minutes to ensure it maintains temperature. Use an oven thermometer to verify accuracy.
This process usually takes 30 to 60 minutes for someone with basic handyman skills. No special tools required beyond a screwdriver and a multimeter. If you encounter rusted screws or tight spaces, patience is key. Don’t force things. If you feel stuck, call a pro. It’s better to pay for help than to damage the oven lining or shock yourself.

Troubleshooting Common Issues After Replacement
You replaced the element, but the oven still acts weird. What’s going on? Here are common post-repair problems and fixes.
- Oven heats unevenly: This might not be the element’s fault. Check the oven fan. In convection ovens, the fan circulates hot air. If it’s blocked or broken, heat pools in one spot. Clean the fan blades and ensure nothing obstructs airflow.
- Temperature fluctuates wildly: The thermostat or temperature sensor might be faulty. These components tell the control board when to turn the element on or off. If the sensor reads incorrectly, the oven overcooks or undercooks. Replacing a sensor is easier than an element and costs about the same.
- Element sparks or smells burning: Did you install the element correctly? Sparks indicate a loose connection or arcing. Turn off the power immediately. Recheck the terminal screws. A burning smell could be residue from manufacturing, which usually clears after a few cycles. Run the oven empty at high heat for 20 minutes to burn off oils. If the smell persists, inspect for insulation damage.
Also, consider the type of cookware you’re using. Dark, heavy pans absorb heat differently than light glass dishes. If your new element works perfectly but your food still cooks oddly, adjust your baking times slightly. New elements sometimes run hotter or cooler than worn-out ones did. Give your oven a week to settle into its new performance baseline.
Maintaining Your Oven to Extend Element Life
Prevention is cheaper than cure. How long does a heating element last? Typically 5 to 10 years, depending on usage. To maximize its lifespan, avoid spilling sugary or starchy foods directly onto the element. Sugar melts and creates a sticky residue that insulates the coil, causing it to overheat and fail prematurely. If spills happen, clean them up once the oven cools completely. Never scrub a hot element.
Use oven liners cautiously. While they protect the floor, some reflective liners bounce heat back onto the element, stressing it. Non-reflective silicone mats are safer. Also, don’t prop the oven door open for extended periods. This forces the element to cycle on and off rapidly to maintain temperature, wearing it out faster. Finally, keep the oven vents clear. Dust and debris block airflow, leading to overheating. Vacuum around the base of the oven every few months.
Regular maintenance keeps your oven running smoothly and avoids unexpected breakdowns during holiday dinners. A quick wipe-down after each use prevents buildup that could interfere with sensors or heating surfaces. Small habits save big headaches later.
How much does it cost to replace an oven heating element?
The part itself costs between $20 and $60 for most standard brands. If you hire a professional, expect to pay $175 to $350 total, including labor and diagnostic fees. DIY repairs keep the cost under $60.
Can I replace the oven heating element myself?
Yes, if you have basic handyman skills and a multimeter. The process involves unscrewing the old element, disconnecting wires, and installing the new one. Always disconnect power at the breaker before starting. It typically takes 30 to 60 minutes.
What are the signs of a bad oven heating element?
Visible breaks or blisters in the coil, failure to glow red when turned on, uneven cooking temperatures, or an infinite resistance reading on a multimeter. Sometimes the element looks fine but fails internally.
Should I replace my oven or just the heating element?
Replace the element unless your oven is over 10 years old, has multiple failing components, or is highly inefficient. Repairing the element costs a fraction of a new oven ($20-$350 vs. $800+).
Why is my oven heating element sparking?
Sparking usually indicates a loose wire connection or damaged insulation. Turn off the power immediately and check the terminal screws. If the element is installed correctly and still sparks, replace it and inspect the oven’s internal wiring for damage.